
Hey, what answers do you need?
Profiles Backup
How to create backup of profiles
✦ Start Session Splitter from Desktop shortcut or start menu.
✦ Sign in with your username and password. You will see profiles list. If its first time you logged into Session Splitter, know how to create a profile.
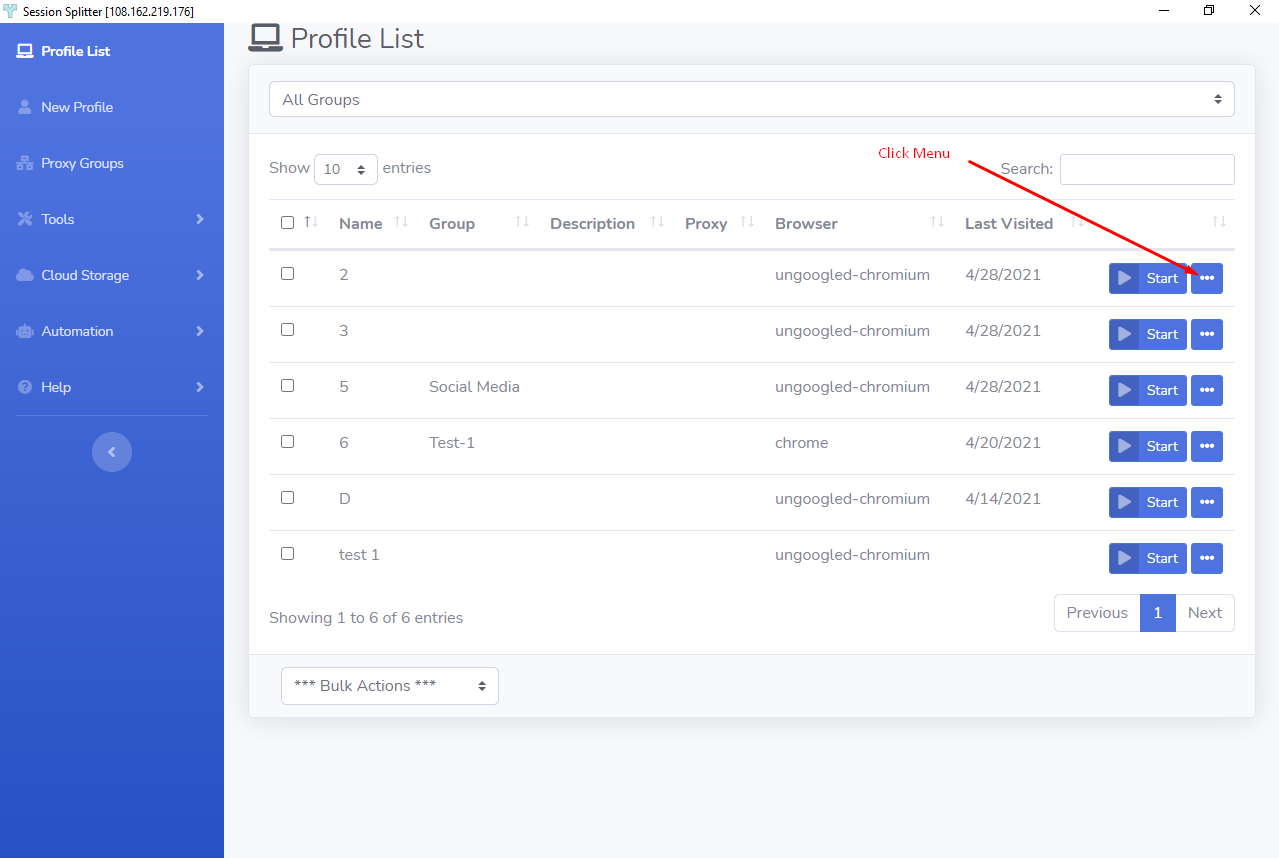
✦ Click on the three dots menu, right next to ‘Start’ button.
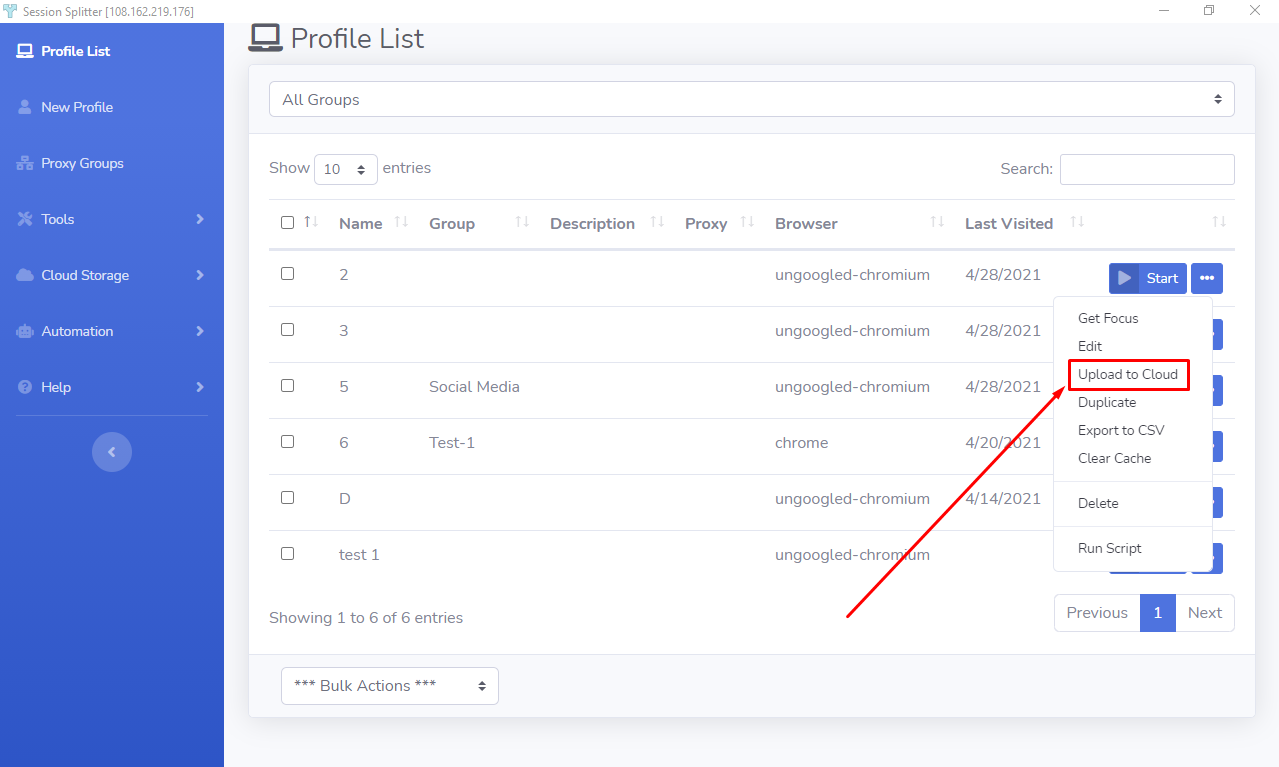
✦ Now click on ‘Upload to Cloud’
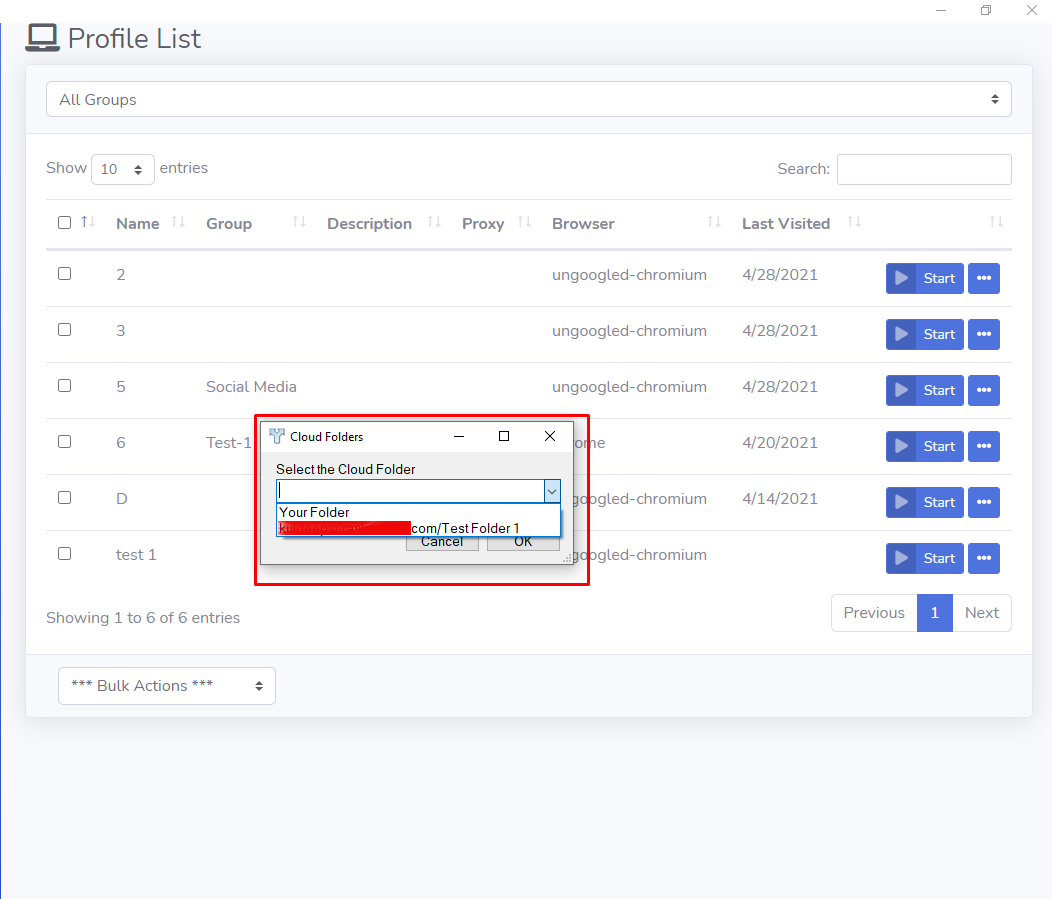
✦ A dialogue box will open and ask to select a folder for this profile. Learn how to create folders on cloud. Select the folder and hit OK.
✦ A dialogue box will open with a progress bar. It closes when uploading completes.
✦ Now click on the ‘Cloud Storage’ on the left. And, click on ‘List Profiles’.
✦ You will see a list of profiles. All the profiles you uploaded to cloud are shown here. If you had uploaded a profile in the past and then you deleted the profile from main profiles list (saved at your system), you will see that profile too on the list.
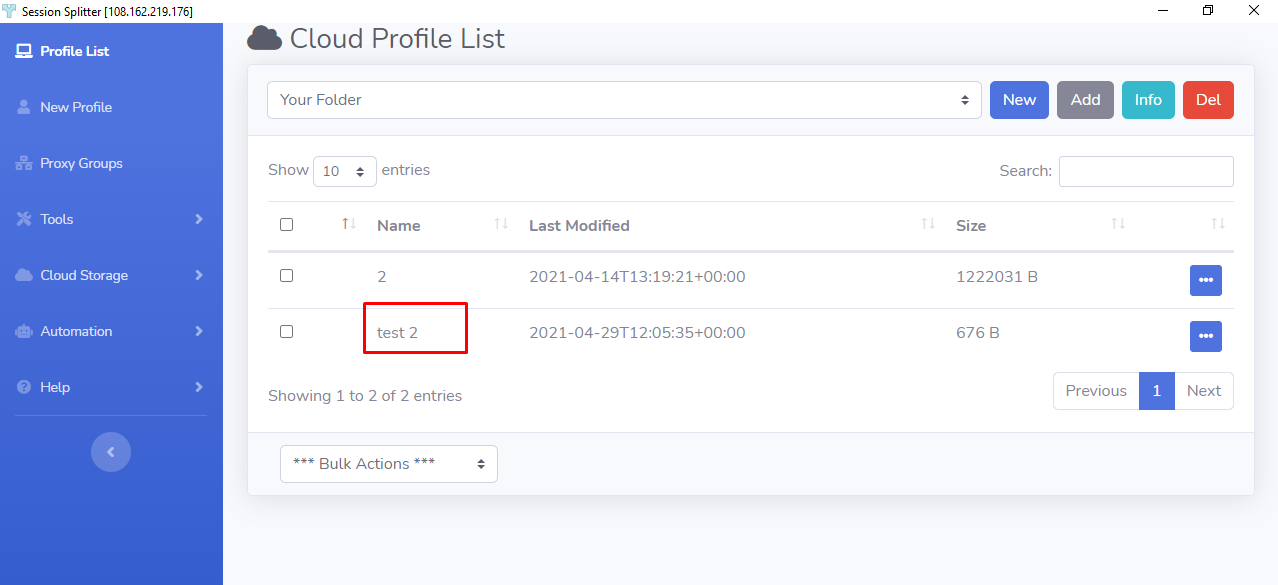
✦ In the first screenshot, you can see that there are six profiles in the main list, there is no profile with the name ‘test 2’. Now see the screenshot above, there are two profiles on the cloud. One is named ‘2’ that we just uploaded to cloud. And second, ‘test 2’ is the profile that we uploaded to cloud the other day and then deleted from the main list.