
Hey, what answers do you need?
Profile Groups
Session Splitter provides you an option to put profiles in a group.
You can group profiles for a client, social media, type of clients etc. It’s up to you how you manage profile groups.
How to group profiles
✦ Start Session Splitter from Desktop shortcut or start menu.
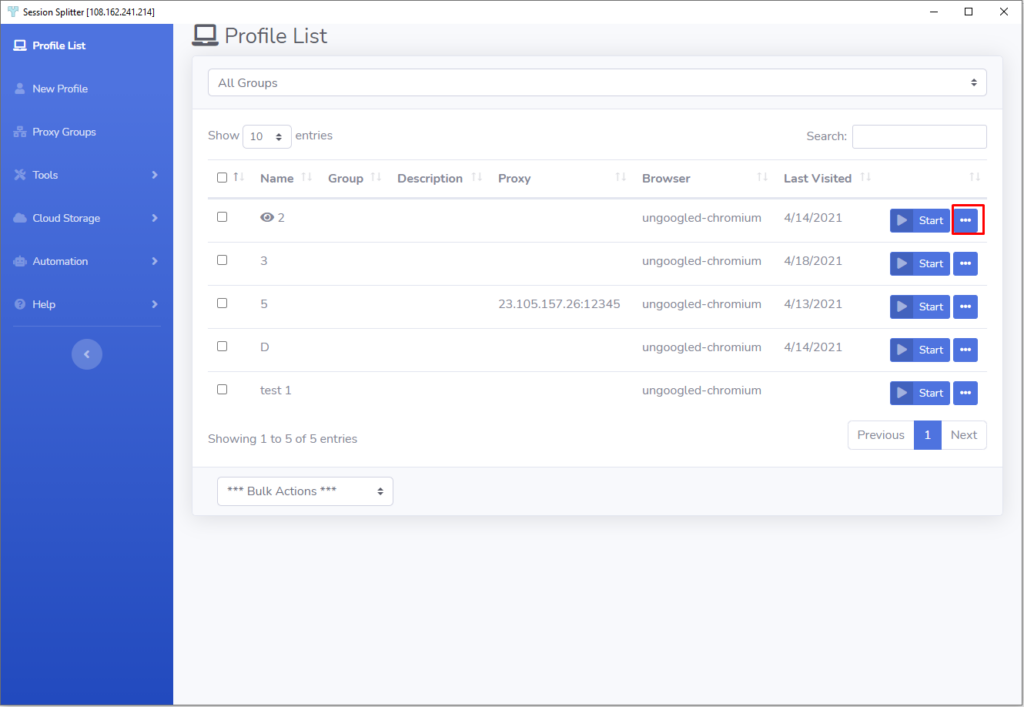
✦ Sign in with your username and password. You will see profiles list. If its first time you logged into Session Splitter, know how to create a profile.
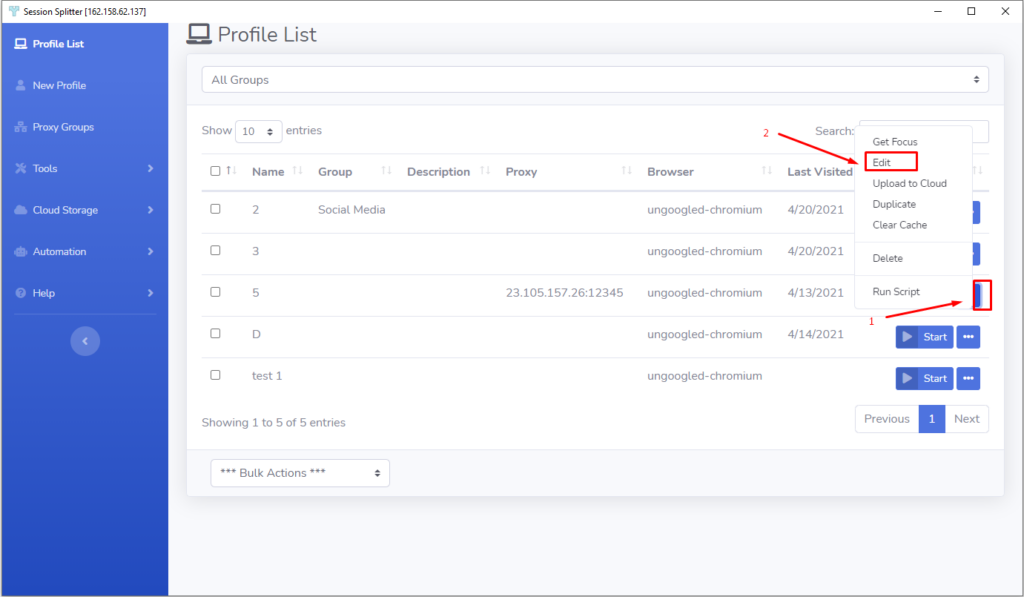
✦ Click on the three dots menu, right next to ‘Start’ button.
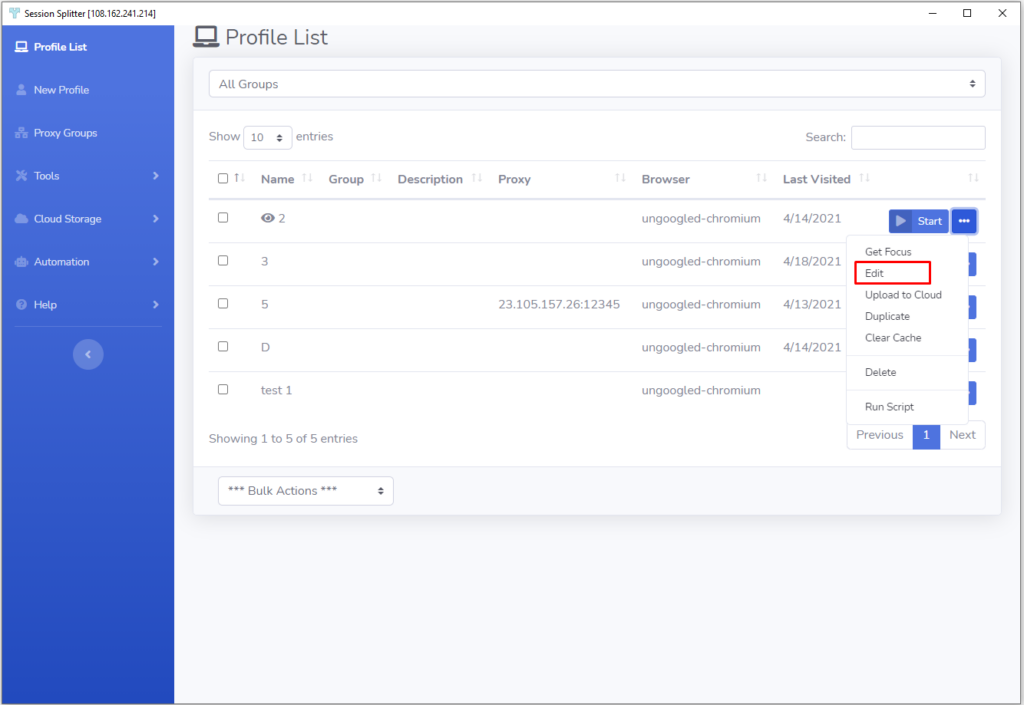
✦ Now click on ‘Edit’. (see screenshot below)
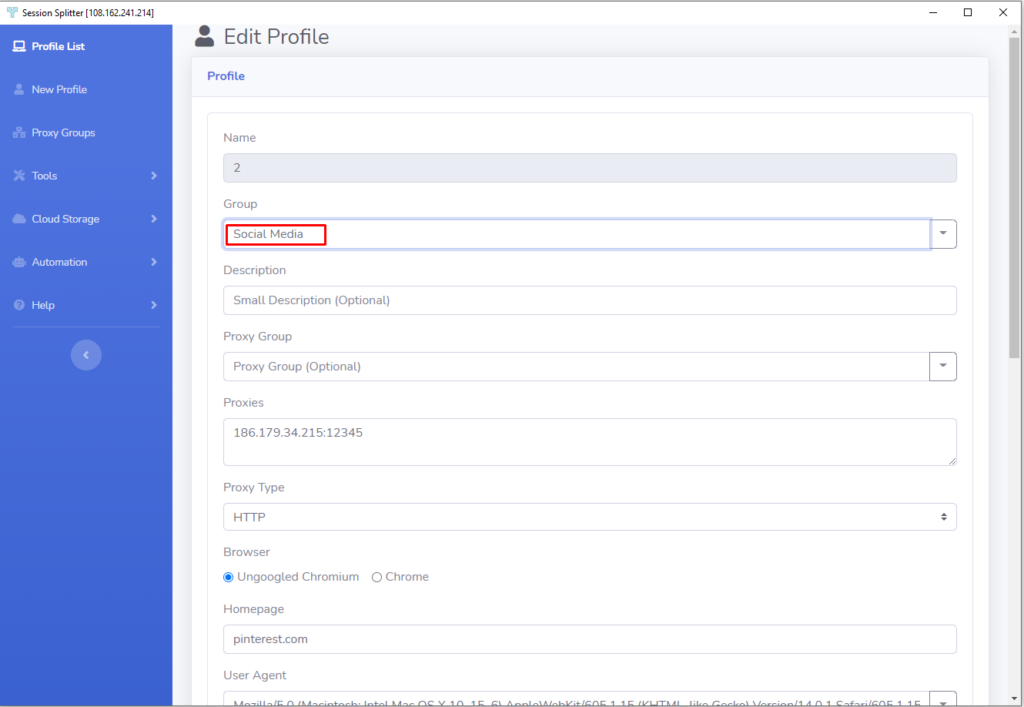
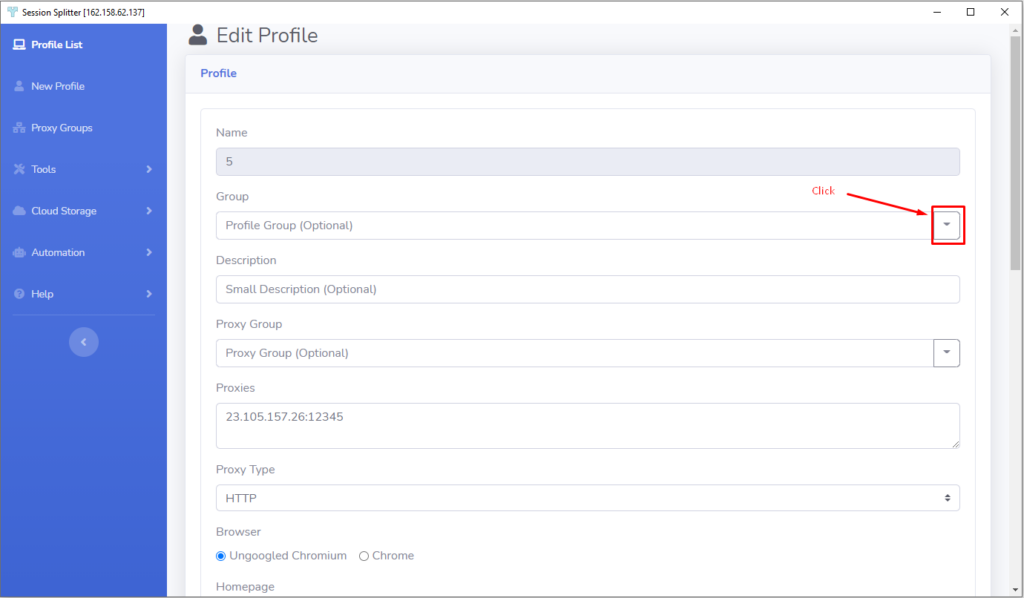
✦ Just below the profile name, there is a text box (along with a dropdown at right) to enter the new group name.

✦ Enter the group name in the text box if there is no group available.
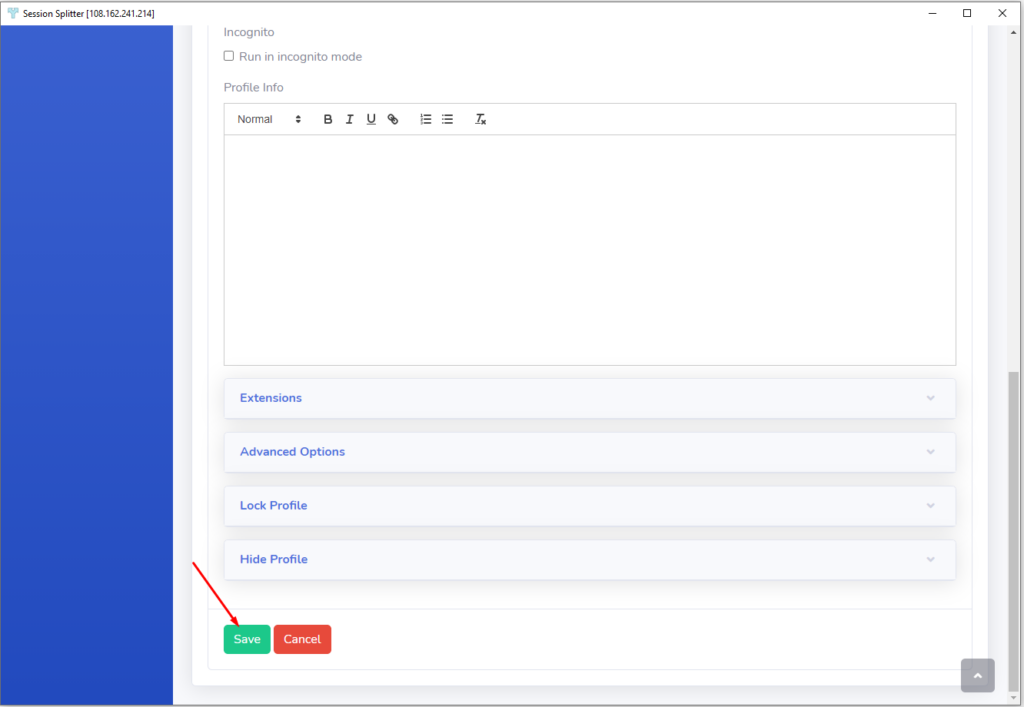
✦ Hit the save button at the bottom to save the profile. The group will be saved automatically.
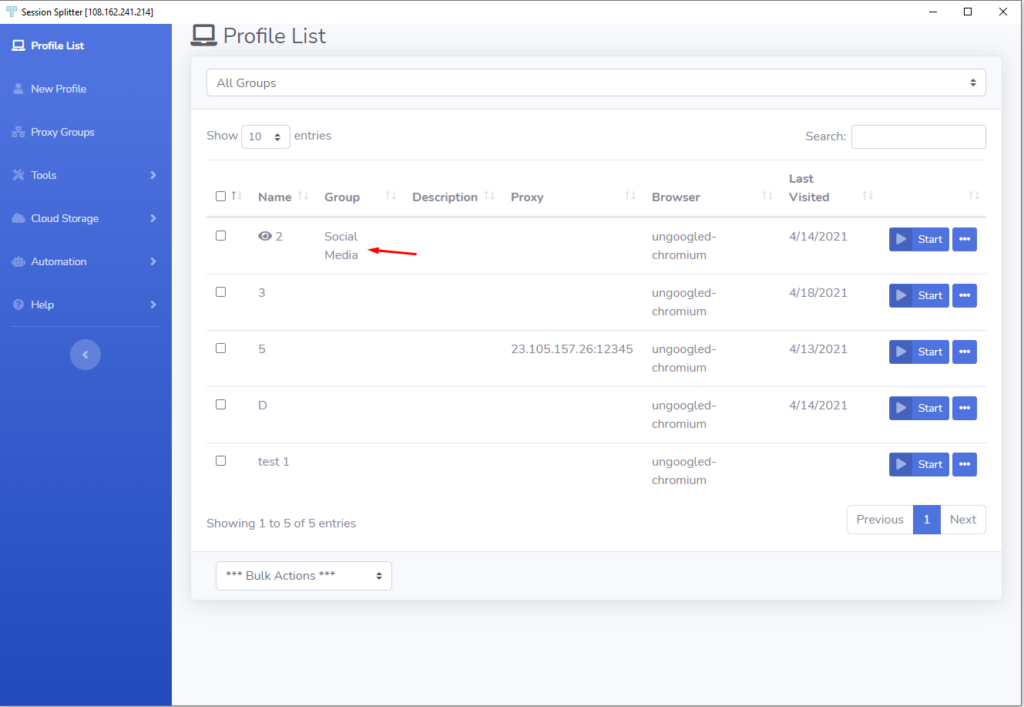
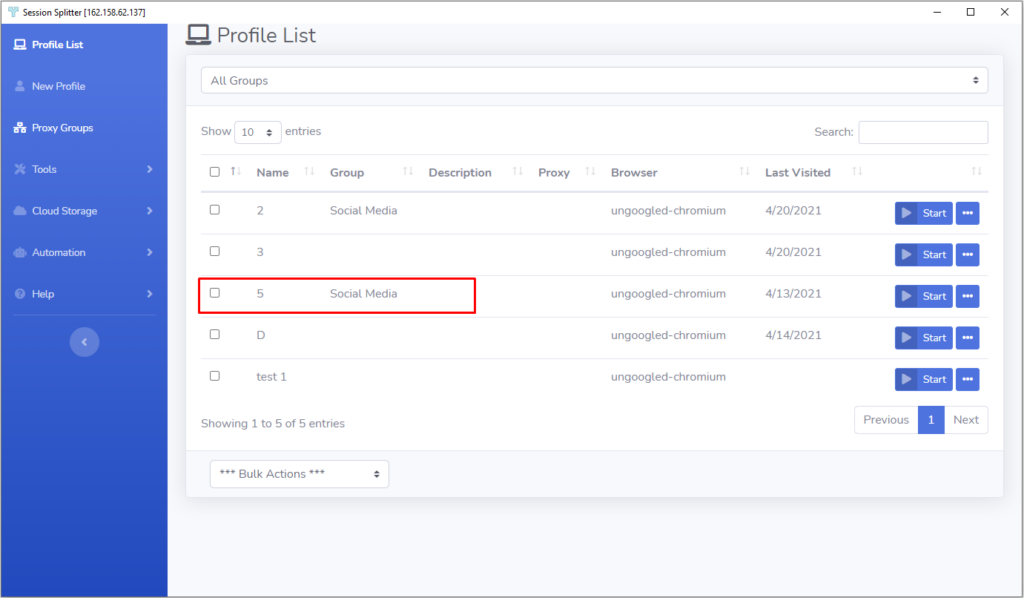
✦ You can see that in the profiles list, the profile is added to the group ‘Social Media’
✦ If you want to add another profile in the group ‘Social media’, select the profile and click ‘edit’
✦ Click the dropdown button in the ‘Group’ row in the profile editor.
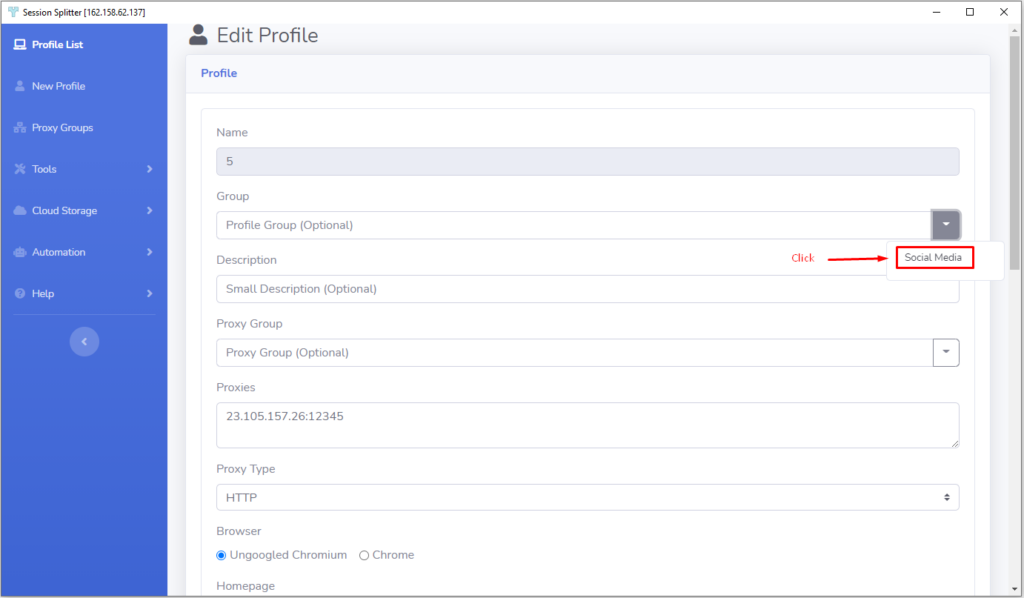
✦ Now click on the group ‘Social Media’ and hit the save button at the bottom.
✦ You will be returned to profiles list. Here you can see that your selected profile is added to the group ‘Social media’
✦ You can create unlimited number of groups and add profiles to these group as per your requirements.